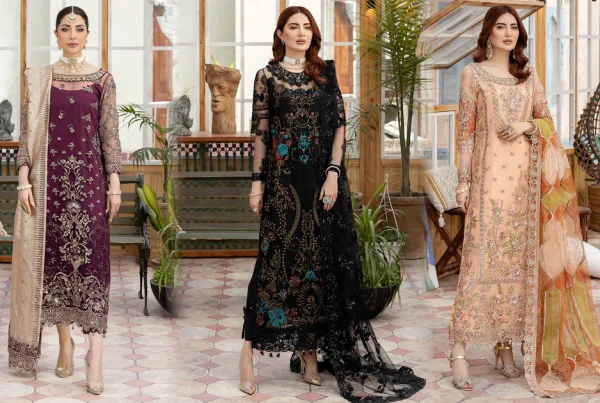
The dupatta is one of the most versatile and elegant accessories in South Asian fashion. This beautiful length of fabric—typically ranging from 2 to 3 meters—has the power to completely transform any outfit, from simple everyday shalwar kameez to elaborate formal ensembles. Yet, many women struggle with styling their dupatta beyond the basic drape, often feeling like it’s just something to manage rather than a statement piece that enhances their entire look.
If you’ve ever wondered how to wear your dupatta in ways that look effortlessly chic, stay secure throughout the day, and showcase your personal style, you’re in the right place. This comprehensive guide will walk you through five modern dupatta draping styles that are perfect for contemporary women who want to honor tradition while embracing modern aesthetics.
Whether you’re rushing to work, attending a wedding, or simply want to elevate your everyday look, mastering these dupatta draping techniques will revolutionize how you wear and feel in your traditional outfits. Let’s explore the art of dupatta styling and discover how this single piece of fabric can become your most powerful fashion tool.
Understanding the Dupatta: More Than Just a Scarf
Before diving into specific draping styles, it’s important to understand what makes the dupatta such a special element of South Asian fashion.
What is a Dupatta?
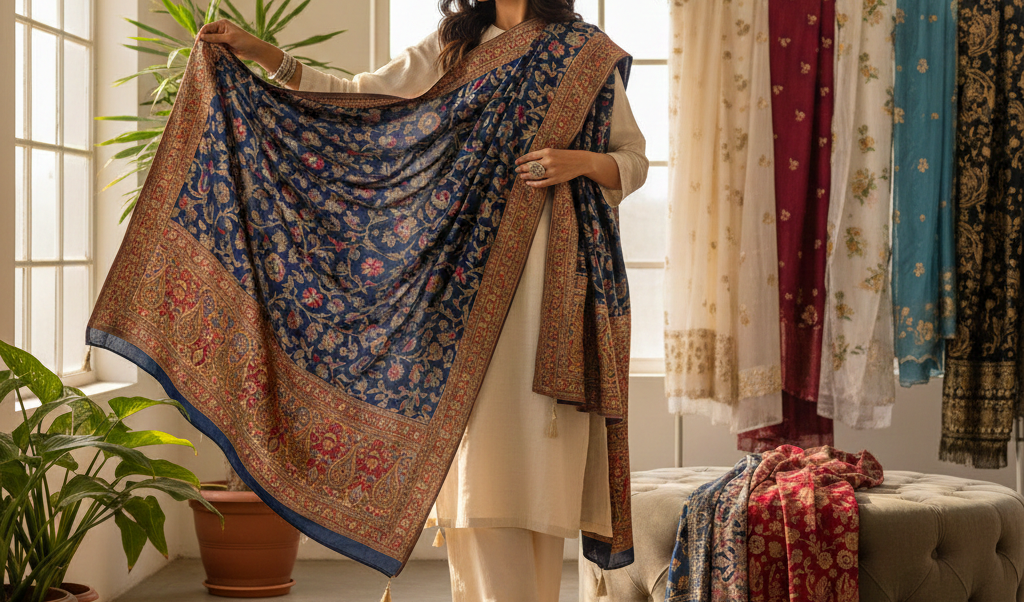
A dupatta (also spelled dupata) is a long scarf or shawl worn with traditional South Asian outfits like shalwar kameez, lehenga choli, and salwar suits. The word “dupatta” comes from the Sanskrit words “du” (two) and “patta” (strip of cloth), literally meaning “two pieces of cloth.”
Cultural Significance
The dupatta has deep cultural and religious significance across South Asia. Traditionally, it represents modesty and grace, often used to cover the head or chest during religious ceremonies or in the presence of elders. However, modern fashion has evolved to embrace the dupatta as a styling element while respecting its cultural roots.
Types of Dupattas
By Fabric:
- Cotton/Lawn: Lightweight, breathable, perfect for everyday wear
- Chiffon: Flowy, elegant, ideal for draping
- Georgette: Slightly heavier than chiffon, holds structure well
- Silk: Luxurious, formal, makes a statement
- Net: Sheer and delicate, perfect for formal occasions
- Organza: Stiff and structured, creates dramatic drapes
- Velvet: Rich and heavy, best for winter and formal events
- Modal/Jersey: Stretchy and comfortable, stays in place easily
By Size:
- Standard: 2.25-2.5 meters (most common)
- Short: 2 meters or less (easier to manage, modern)
- Long: 2.75-3 meters (more fabric for elaborate drapes)
By Style:
- Plain: Solid colors without embellishment
- Printed: Featuring patterns, florals, or designs
- Embroidered: With threadwork, zari, or embellishments
- Bordered: Embellished or contrasting borders on edges
- Crushed/Textured: Pre-textured for easy draping
Choosing the Right Dupatta for Different Drapes
The success of any dupatta drape depends significantly on choosing the right fabric:
- For flowing drapes: Chiffon, georgette, or soft silk
- For structured drapes: Organza, net, or starched cotton
- For easy, no-fuss drapes: Cotton, modal, or jersey
- For formal, elegant drapes: Silk, chiffon, or embellished net
- For secure drapes: Lighter fabrics that can be pinned easily
Essential Tools and Accessories for Dupatta Styling
Before we explore the five modern draping styles, let’s cover the essential tools that will make your dupatta styling easier, more secure, and longer-lasting.
Must-Have Accessories
1. Safety Pins The unsung hero of dupatta styling. Keep several sizes:
- Small pins for delicate fabrics
- Medium pins for everyday use
- Large pins for heavy dupattas Choose rust-proof, high-quality pins to avoid fabric damage.
2. Dupatta Pins/Brooches Decorative pins that serve both functional and aesthetic purposes:
- Traditional brooches with stones or pearls
- Modern minimalist pins
- Magnetic dupatta pins (no holes in fabric)
- Statement brooches for formal occasions
3. Bobby Pins Essential for head draping styles:
- Match to your hair color
- Use multiple pins for security
- Keep extras in your bag
4. Fabric Clips Specifically designed for dupatta styling:
- Crocodile clips for temporary holds
- Decorative clips that double as accessories
- Invisible clips for seamless looks
5. Fashion Tape/Double-Sided Tape For extra security without pins:
- Fabric-friendly tape
- Keeps dupatta in place on slippery fabrics
- No holes or marks on clothes
6. Hair Bands/Elastic For head draping styles:
- Match to your hair color
- Thin bands for invisibility
- Keep dupatta secure on head
Preparation Tips
Before draping your dupatta:
- Iron or Steam: A crisp dupatta drapes better and looks more polished
- Check for Damage: Ensure no tears or loose threads
- Plan Your Look: Decide on draping style based on occasion and outfit
- Gather Tools: Have all pins and accessories ready
- Consider Weather: Wind and rain affect certain drapes more than others
The 5 Modern Dupatta Draping Styles
Now, let’s explore five contemporary dupatta draping styles that are practical, stylish, and perfect for modern women navigating various occasions and settings.
Style 1: The Side Sweep Drape
Perfect For: Office wear, casual outings, running errands, everyday elegance
Difficulty Level: Easy
Best Fabrics: Cotton, chiffon, georgette, lawn
Time Required: 2-3 minutes
Why This Style Works
The Side Sweep is the ultimate modern dupatta drape. It’s professional, practical, and effortlessly chic. This style keeps your dupatta secure and out of the way while still adding that essential traditional element to your outfit. It’s perfect for women who want to look put-together without fussing with their dupatta throughout the day.
Step-by-Step Instructions
Step 1: Find the Center Hold your dupatta and find the center point. You can do this by folding the dupatta in half lengthwise and marking the center with your fingers.
Step 2: Place on One Shoulder Place the center point of your dupatta on your left shoulder (or right, depending on preference). The dupatta should rest comfortably on your shoulder with equal lengths hanging down the front and back.
Step 3: Drape Across Take the front portion (the part hanging down your chest) and drape it across your body toward your opposite hip. Let it fall naturally across your torso in a diagonal line.
Step 4: Bring to Back Take the same front end and bring it around your back to your starting shoulder. This creates a wraparound effect.
Step 5: Pin at Shoulder Pin both layers of the dupatta together at your starting shoulder using a safety pin or decorative brooch. Place the pin at the back of your shoulder (near the neckline) for a clean look.
Step 6: Adjust the Back The back portion should hang naturally down your back. Adjust the length so it’s even and drapes smoothly.
Step 7: Final Touches Adjust the front drape so it lies flat and smooth across your chest. The diagonal drape should be neat and even. You can add a second pin at your opposite hip for extra security if needed.
Styling Variations
Professional Version:
- Keep the drape tight and close to your body
- Pin at both shoulder and hip for complete security
- Choose solid colors or subtle prints
- Ensure no fabric hangs loose or trails
Casual Version:
- Allow more looseness in the drape
- Let one end hang longer for a relaxed vibe
- Play with printed or colorful dupattas
- Skip the hip pin for more flow
Dressy Version:
- Use a heavily embellished dupatta
- Add a decorative brooch at the shoulder pin point
- Arrange pleats in the front drape for texture
- Choose silk or chiffon for elegant flow
Pro Tips for the Side Sweep
- Pin Placement: Pin at the back of your shoulder, not the top, to avoid visible pins
- Length Balance: Ensure the back portion isn’t too long that you’ll step on it
- Fabric Choice: Lighter fabrics work best for all-day comfort
- Multiple Pins: Use 2-3 pins along the shoulder for heavy dupattas
- Weather-Proof: This style stays secure even in windy conditions
- Arm Movement: Test by raising your arms to ensure the drape stays in place
Common Mistakes to Avoid
- Making the drape too tight (restricts movement)
- Letting the back portion drag on the ground
- Using only one pin with heavy fabric
- Creating uneven lengths front and back
- Placing pins too visibly on top of the shoulder
When to Wear the Side Sweep
Ideal Occasions:
- Daily office wear
- College or university
- Shopping or errands
- Casual family gatherings
- Lunch dates
- Working from home (comfort + style)
- Travel (secure and practical)
Not Ideal For:
- Very formal weddings (too casual)
- Events where head covering is required
- Occasions requiring traditional full draping
Style 2: The Double Drape (Front & Back Balance)
Perfect For: Formal events, weddings, parties, special occasions
Difficulty Level: Medium
Best Fabrics: Chiffon, georgette, silk, net
Time Required: 5-7 minutes
Why This Style Works
The Double Drape is elegant, balanced, and perfect for showcasing beautiful dupattas. This style ensures your dupatta is visible from all angles, making it ideal for events where you want to make a statement. It’s particularly flattering for formal shalwar kameez and creates a sophisticated, traditional look with modern sensibility.
Step-by-Step Instructions
Step 1: Determine Your Lengths Hold your dupatta and decide on proportion. Typically, you want approximately 40% on one side and 60% on the other (not exactly half-and-half).
Step 2: Drape the Longer Side Place the longer end (60%) of your dupatta on your right shoulder, letting it hang down your back. This will be your primary back drape.
Step 3: Drape the Shorter Side The shorter end (40%) should hang down your front from the same shoulder. This creates your front display piece.
Step 4: Pin at Shoulder Pin the dupatta securely at your shoulder where both sides meet. Use a decorative brooch here, as this pin will be visible.
Step 5: Create Front Pleats Take the front portion and create 3-5 neat accordion pleats near your shoulder. Pin these pleats in place at your shoulder or upper chest. The pleats should fan out slightly as they fall.
Step 6: Adjust Front Drape Let the pleated front portion fall naturally across your chest and toward your opposite hip. You can pin it again at your waist on the opposite side if desired.
Step 7: Style the Back Adjust the back portion so it drapes evenly down your back. You can create loose pleats at the shoulder or let it fall naturally depending on your fabric.
Step 8: Optional Across-the-Body For added security and style, you can bring the front end around your back and drape it over your opposite shoulder, creating a wraparound effect.
Styling Variations
Wedding Guest Version:
- Use heavily embroidered dupatta with intricate borders
- Create more pronounced pleats (7-9 pleats)
- Add multiple decorative pins along the pleats
- Let both ends be longer for dramatic effect
Party Version:
- Choose shimmery or sequined dupatta
- Keep pleats moderate (4-6 pleats)
- Add statement brooch at shoulder
- Adjust length to just above the floor
Formal Dinner Version:
- Opt for solid silk or subtle print
- Create crisp, precise pleats
- Keep everything well-pinned and structured
- Ensure back drape is neat and even
Pro Tips for the Double Drape
- Pleat Perfection: Make pleats uniform in width (about 2-3 inches each)
- Pin Strategically: Use multiple pins to secure pleats, hidden between folds
- Shoulder Padding: This style works better with outfits that have some shoulder structure
- Balance Check: View from all angles (front, back, sides) in a mirror
- Brooch Placement: Position brooch at the shoulder curve, not on top
- Fabric Matters: Stiffer fabrics like organza hold pleats better
Common Mistakes to Avoid
- Creating too many pleats (looks cluttered)
- Making pleats too wide or too narrow
- Uneven back draping
- Using fabric that’s too heavy for this style
- Not securing pleats properly (they come undone)
- Placing all weight on one shoulder
When to Wear the Double Drape
Ideal Occasions:
- Wedding ceremonies (as a guest)
- Formal parties and galas
- Engagement ceremonies
- Mehendi or Sangeet events
- Festival celebrations (Eid, Diwali)
- Formal photoshoots
- Special family occasions
Not Ideal For:
- Everyday wear (too elaborate)
- Casual outings
- Events requiring lots of movement
- Very hot weather (too much fabric)
Style 3: The Modern One-Shoulder Statement
Perfect For: Contemporary events, cocktail parties, modern weddings, fashion-forward occasions
Difficulty Level: Easy to Medium
Best Fabrics: Chiffon, georgette, silk, lightweight fabrics
Time Required: 3-5 minutes
Why This Style Works
The One-Shoulder Statement is the most contemporary and fashion-forward of all dupatta drapes. It combines the elegance of traditional attire with the sophistication of modern design. This style is perfect for women who want to stand out while maintaining cultural authenticity. It’s also incredibly practical—you have full use of one arm while the dupatta creates a stunning asymmetrical silhouette.
Step-by-Step Instructions
Step 1: Choose Your Statement Shoulder Decide which shoulder will bear the dupatta. Most people choose their left shoulder, but right works equally well. This will be your “statement shoulder.”
Step 2: Initial Placement Take your entire dupatta and place it on your chosen shoulder, letting both ends hang down the front of your body. The center of the dupatta should rest on your shoulder.
Step 3: Pin at Shoulder Pin the center of the dupatta securely to your outfit at the shoulder. You can use a decorative brooch or hidden pin, depending on your look.
Step 4: Drape One End Across Take the front end closest to your neck and drape it across your chest toward your opposite hip, creating a diagonal line. Let this end hang down at your opposite side.
Step 5: Pin at Hip Pin this draped end at your opposite hip or waist to keep it secure. The pin should be hidden under the fabric for a seamless look.
Step 6: Style the Second End Take the remaining end (the one closer to your arm) and drape it backward over your statement shoulder. It should fall down your back elegantly.
Step 7: Create Volume Adjust the fabric at your shoulder to create some volume and dimension. You can bunch it slightly or create soft pleats for texture.
Step 8: Final Adjustments Ensure the front drape lies smooth and diagonal across your torso. The back portion should flow down your back without twisting. Check that both ends are even in length or intentionally asymmetrical for a modern look.
Styling Variations
Minimalist Modern:
- Use a solid-colored dupatta in a neutral tone
- Keep draping flat and sleek
- Minimal pins (only at shoulder and hip)
- Let fabric flow naturally without embellishment
Bollywood Glam:
- Choose a heavily embellished or sequined dupatta
- Create more volume at the shoulder
- Add statement jewelry on the bare shoulder
- Let one end trail longer for drama
Contemporary Fusion:
- Mix and match: traditional dupatta with modern Western-cut kurta
- Experiment with contrasting colors
- Add a belt at the waist over the draped dupatta
- Create intentional asymmetry in lengths
Red Carpet Ready:
- Select luxury fabric (silk, chiffon with embroidery)
- Create dramatic shoulder volume with pleating
- Add brooch or jewelry at shoulder focal point
- Ensure impeccable draping with professional finishing
Pro Tips for the One-Shoulder Statement
- Shoulder Spotlight: This style draws attention to shoulders, so ensure your blouse/kameez fits perfectly
- Jewelry Balance: Keep jewelry minimal on the draped shoulder, focus on the bare side
- Pin Security: Use 2-3 pins at the shoulder for heavy fabrics
- Posture Matters: Stand straight—this style looks best with good posture
- Fabric Flow: Choose fabrics that flow and drape rather than stiff materials
- Evening Events: This style photographs beautifully, perfect for events with lots of photos
Common Mistakes to Avoid
- Using fabric that’s too stiff (won’t drape elegantly)
- Creating too much bulk at the shoulder
- Uneven or twisted back draping
- Not securing at the hip (front piece shifts)
- Choosing busy patterns that distract from the drape
- Letting the back piece twist or fold incorrectly
When to Wear the One-Shoulder Statement
Ideal Occasions:
- Cocktail parties with traditional dress code
- Modern/contemporary weddings
- Fashion events or shows
- Evening receptions (Walima)
- New Year’s Eve or celebration parties
- Date nights with traditional attire
- Photo sessions and shoots
- Award ceremonies or formal galas
Not Ideal For:
- Conservative family gatherings
- Religious ceremonies requiring head covering
- Traditional weddings with strict dress codes
- Everyday casual wear
- Events with elderly or conservative guests
Style 4: The Head Drape with Style
Perfect For: Religious events, traditional ceremonies, modest occasions, cultural celebrations
Difficulty Level: Medium
Best Fabrics: Cotton, soft chiffon, georgette, lightweight silk
Time Required: 4-6 minutes
Why This Style Works
The Head Drape offers modesty and cultural respect while remaining stylish and modern. Unlike the traditional full head covering that can feel heavy or restrictive, this modern version is lighter, more secure, and allows you to maintain your hairstyle while covering your head. It’s perfect for occasions where head covering is expected or preferred, from mosque visits to traditional family gatherings.
Step-by-Step Instructions
Step 1: Prepare Your Hair Style your hair before draping. A low bun, braid, or ponytail works best. If you want volume, tease the crown area slightly. Apply hairspray for hold.
Step 2: Position on Head Place the center of your dupatta on the crown of your head, allowing equal lengths to fall on both sides of your face. The dupatta should sit slightly forward on your head, not at the very back.
Step 3: Secure with Pins Use 2-3 bobby pins at the crown to secure the dupatta to your hair. Place pins at angles for better grip. Make sure they’re hidden under the fabric.
Step 4: Drape the Right Side Take the right side of your dupatta and drape it across your right shoulder, letting it fall down your back naturally. Adjust how much of your neck you want to show.
Step 5: Bring Under Chin Take the left side and bring it under your chin (or just below) and drape it over your right shoulder. This creates a graceful frame for your face.
Step 6: Pin at Shoulder Pin both layers together at your right shoulder using a decorative brooch or safety pin. This keeps everything secure.
Step 7: Adjust the Drape Adjust the dupatta around your face to frame it nicely. You can pull it back slightly to show some hair at the front, or keep it forward for more coverage.
Step 8: Style the Ends Both ends should now be hanging down your back/right side. Arrange them evenly or create slight pleats for a polished look. You can pin one end to your left shoulder if desired for balance.
Styling Variations
Mosque/Religious Version:
- Use opaque, non-transparent dupatta
- Ensure complete head coverage
- Avoid decorative pins; use hidden pins only
- Keep both ends covering the chest area
- Choose modest colors and patterns
Modern Modest Version:
- Allow some hair to show at the front (crown area)
- Use lighter, flowy fabrics
- Add decorative brooch at shoulder
- Create soft, romantic framing around face
- One end can be shorter for contemporary look
Wedding Guest Version:
- Use embellished or embroidered dupatta
- Add decorative hair accessories underneath (visible at crown)
- Allow more hair to show for style
- Use statement brooch at shoulder
- Create voluminous draping at back
Casual Covered Version:
- Simple cotton dupatta
- Quick, easy draping
- Minimal pins
- Comfortable and breathable
- Practical for everyday wear
Pro Tips for the Head Drape
- Pin Placement: Bobby pins should go horizontally, not vertically, for better hold
- Hair Grip: Backcomb hair slightly at the crown for pins to grip better
- Face Framing: Adjust the dupatta to flatter your face shape
- Fabric Weight: Heavier dupattas may need more pins or a hair band
- Edge Finishing: Ensure the dupatta edge that frames your face is neat and ironed
- Comfort Check: Make sure pins don’t pull your hair or cause headaches
- Stay Power: Use texturizing spray or dry shampoo on hair for better grip
Common Mistakes to Avoid
- Using too few bobby pins (dupatta slips)
- Placing pins only at the front (back slips off)
- Creating a “nun” look (too tight around face)
- Using transparent dupatta for religious settings
- Pulling hair too tight (causes headaches)
- Not securing at shoulder (entire drape shifts)
- Choosing heavy dupatta (strains neck)
When to Wear the Head Drape
Ideal Occasions:
- Mosque/temple visits
- Religious ceremonies (Nikah, etc.)
- Traditional family functions
- Meeting conservative elders
- Funeral or condolence events
- Traditional weddings with modest dress code
- Ramadan/Eid prayers
- Cultural ceremonies requiring head covering
- Conservative professional settings
Not Ideal For:
- Casual daily wear (unless preferred)
- Modern cocktail parties
- Events in very hot weather
- Dance performances or active events
Style 5: The Belt-Cinched Modern Drape
Perfect For: Casual outings, contemporary fashion, everyday style, fusion looks
Difficulty Level: Easy
Best Fabrics: Lightweight fabrics (cotton, chiffon, georgette, modal)
Time Required: 3-4 minutes
Why This Style Works
The Belt-Cinched Drape is the perfect fusion of Western and Eastern fashion sensibilities. By adding a belt to your traditional dupatta draping, you create definition at the waist, add a modern edge, and keep your dupatta securely in place without constant readjustment. This style is incredibly practical for women on the go while maintaining a fashion-forward appearance. It’s also forgiving for different body types, as the belt creates shape and structure.
Step-by-Step Instructions
Step 1: Choose Your Belt Select a belt that complements your outfit. Options include:
- Thin metallic belt for minimal look
- Statement belt for bold style
- Leather belt for casual edge
- Embellished belt for dressy occasions
- Chain belt for bohemian vibe
Step 2: Initial Drape Place the center of your dupatta on one shoulder (left or right, your choice). Let both ends hang down the front of your body, one on each side of your neck.
Step 3: Cross the Ends Take both ends and cross them at your waist, right over left or left over right. This creates an X at your torso.
Step 4: Wrap Around Take both ends behind your back and bring them around to the front again at your waist level.
Step 5: Position the Belt Place your chosen belt over the dupatta at your natural waist. The belt should go over the wrapped dupatta, securing everything in place.
Step 6: Buckle and Adjust Secure the belt and adjust for comfort. Make sure the dupatta isn’t bunched uncomfortably under the belt.
Step 7: Arrange the Top Adjust the dupatta above the belt—you can create soft blousing, keep it smooth, or arrange it to drape over the belt slightly.
Step 8: Style the Ends The ends hanging from the belt can be styled various ways:
- Let them hang naturally for a relaxed look
- Tuck one end into the belt for asymmetry
- Create a knot or twist for visual interest
- Pin them to your side for a neater finish
Styling Variations
Casual Chic:
- Use a thin brown or black leather belt
- Let ends hang loosely
- Pair with simple, unembellished dupatta
- Wear with straight-cut shalwar kameez or kurta-pants
Boho Fusion:
- Use a wide belt with metallic detailing
- Allow generous blousing above the belt
- Let ends flow freely
- Add layered jewelry
- Pair with printed or tie-dye dupatta
Office Professional:
- Choose a sleek, thin belt in neutral color
- Keep draping neat and structured
- Tuck ends neatly or pin them
- Use solid-colored dupatta
- Pair with tailored shalwar kameez
Evening Glam:
- Use an embellished or metallic statement belt
- Create elegant blousing above belt
- Let embroidered ends be focal points
- Add coordinating accessories
- Pair with formal outfit
Pro Tips for the Belt-Cinched Drape
- Belt Width: Thin belts for petite frames, wider belts for taller/curvier figures
- Placement: Place belt at natural waist (narrowest part) for most flattering look
- Fabric Volume: Lighter fabrics work better; heavy dupattas create too much bulk
- Color Coordination: Belt should complement either outfit or dupatta
- Blousing Amount: Adjust blousing above belt based on your torso length
- End Length: Ensure ends aren’t so long you’ll step on them
- Comfort: Make sure belt isn’t too tight over wrapped fabric
Common Mistakes to Avoid
- Using a belt that’s too large (creates bulk)
- Placing belt too high or too low (unflattering proportions)
- Creating too much blousing (looks messy)
- Using heavy, embellished dupatta (too much weight/bulk)
- Not adjusting fabric under belt (uncomfortable lumps)
- Choosing belt that clashes with outfit aesthetic
- Wrapping dupatta too tightly before adding belt
When to Wear the Belt-Cinched Drape
Ideal Occasions:
- Casual day outings
- Shopping or brunch with friends
- College or university
- Creative work environments
- Casual Friday at office
- Informal family gatherings
- Weekend wear
- Travel (comfortable and secure)
- Cafes and casual restaurants
- Art galleries or exhibitions
Not Ideal For:
- Very formal weddings
- Traditional ceremonies
- Conservative religious events
- Occasions requiring head covering
- Very hot weather (extra layer at waist)
Bonus Tips for All Dupatta Draping Styles
Making Any Drape Last All Day
Pre-Draping Preparation:
- Iron thoroughly: Wrinkles make any drape look messy
- Check for stains: Clean any spots before wearing
- Pre-fold pleats: Use clips overnight to set pleats in place
- Apply fabric spray: Light starch or wrinkle-release spray helps hold shape
During-Event Maintenance:
- Strategic pin placement: Use more pins than you think you need
- Fashion tape backup: Apply at stress points (shoulder, hip)
- Bathroom checks: Quick adjustments every 2-3 hours
- Emergency kit: Carry extra pins, mini brush, fabric tape
- Avoid fidgeting: Constant adjustment loosens drapes
Dealing with Common Issues:
Slipping dupatta:
- Add more pins at anchor points
- Use rubber-backed pins for slippery fabrics
- Try fashion tape under pins
- Consider a different draping style for that fabric
Wind disasters:
- Pin strategically at multiple points
- Weight down ends with small sewn-in weights
- Choose heavier fabrics for outdoor events
- Opt for wrapped styles rather than flowing ones
Wrinkles during event:
- Bathroom steam trick: Hang in bathroom during shower
- Carry mini steamer in car
- Smooth with damp hands
- Prevention: Choose wrinkle-resistant fabrics
Dupatta Care and Maintenance
Storage:
- Fold carefully: Along lengthwise, then in thirds
- Use tissue paper: Place between folds to prevent creasing
- Separate by fabric: Store different materials separately
- Avoid hangers: Can stretch or distort shape
- Cedar or lavender: Keep moths away naturally
Cleaning:
- Check label: Always follow care instructions
- Gentle cycle: Or hand wash for delicate fabrics
- Cold water: Prevents color bleeding
- Mild detergent: Harsh chemicals damage embellishments
- Air dry: Avoid dryer for most dupattas
- Professional cleaning: For heavily embellished or silk dupattas
Embellishment Care:
- Turn inside out: When washing or ironing
- Low heat: Use pressing cloth when ironing
- Fix loose elements: Repair immediately to prevent further damage
- Gentle handling: Embroideries and beadwork are delicate
Dupatta Styling for Different Body Types
Petite Frame
Best Styles:
- Side Sweep (keeps proportions balanced)
- Belt-Cinched Drape (defines waist)
- One-Shoulder Statement (creates vertical line)
Avoid:
- Too much volume or fabric
- Drapes that add width
- Very long, trailing dupattas
Tips:
- Choose shorter dupatta length (2-2.25 meters)
- Create vertical lines with draping
- Avoid heavy embellishments that overwhelm
Tall Frame
Best Styles:
- Double Drape (showcases height beautifully)
- Head Drape (proportions work well)
- One-Shoulder Statement (dramatic on tall figures)
Avoid:
- Dupattas that are too short
- Horizontal draping only
Tips:
- Can carry longer dupattas (2.75-3 meters)
- Heavy embellishments work well
- All styles work; experiment freely
Curvy/Plus Size
Best Styles:
- Belt-Cinched Drape (defines waist)
- Side Sweep (elongating diagonal line)
- One-Shoulder Statement (creates angles)
Avoid:
- Bulky, wrapped styles around midsection
- Multiple layers at stomach area
- Overly tight draping
Tips:
- Use draping to create definition
- Strategic pin placement to avoid bulk
- Flowing fabrics that skim rather than cling
Athletic/Straight Frame
Best Styles:
- Double Drape (creates curves with pleating)
- Belt-Cinched Drape (adds waist definition)
- Wrapped styles with volume
Avoid:
- Very simple, straight drapes
- Minimal styling
Tips:
- Create volume with pleats and gathering
- Use belt to create waist
- Layer for dimension
Dupatta Draping for Different Occasions
Office/Professional
Recommended Style: Side Sweep or Belt-Cinched (professional version) Fabric: Cotton, light silk, subtle prints Colors: Neutrals, jewel tones, professional palette Key Points:
- Secure draping (won’t slip during meetings)
- Modest coverage
- Won’t interfere with work tasks
- Easy to maintain throughout day
Casual Outings
Recommended Style: Belt-Cinched or Side Sweep (casual version) Fabric: Cotton, lightweight chiffon, prints Colors: Any, including bright and playful Key Points:
- Comfortable for movement
- Easy to adjust
- Won’t require constant attention
- Practical for activities
Weddings (As Guest)
Recommended Style: Double Drape or One-Shoulder Statement Fabric: Silk, embellished chiffon, net Colors: Rich jewel tones, metallics, coordinated with outfit Key Points:
- Elegant and formal
- Photo-worthy
- Showcases beautiful dupatta
- Appropriate for long events
Religious/Traditional Events
Recommended Style: Head Drape Fabric: Opaque materials, modest colors Colors: Subtle, traditional colors Key Points:
- Respectful coverage
- Cultural appropriateness
- Secure for extended wear
- Comfortable for prayer/sitting
Parties/Evening Events
Recommended Style: One-Shoulder Statement or Double Drape Fabric: Flowing, luxurious materials Colors: Bold, statement colors or metallics Key Points:
- Fashion-forward
- Photogenic
- Allows movement for dancing
- Makes a statement
Frequently Asked Questions
How do I keep my dupatta from slipping?
Use multiple pins at anchor points, apply fashion tape at stress points, choose fabrics with texture (avoid very slippery silk), and ensure pins go through both the dupatta and your outfit for security.
Can I wear a dupatta with Western outfits?
Absolutely! Modern fusion styling pairs dupattas with jeans, skirts, or Western-style tops. The belt-cinched drape and one-shoulder statement work particularly well for fusion looks.
What if my dupatta is too long?
You can fold it in half lengthwise before draping, adjust your draping style to accommodate extra length, or have it hemmed to your preferred length by a tailor.
How many pins should I use?
For lightweight fabrics and simple drapes: 2-3 pins. For medium-weight fabrics and moderate draping: 4-6 pins. For heavy fabrics and elaborate drapes: 6-10 pins. Always prioritize security over aesthetics.
Can I mix and match dupatta colors with my outfit?
Yes! You don’t need to match exactly. Complementary colors work beautifully. Try matching your dupatta to a color in your outfit’s embroidery, accessories, or shoes. Contrasting dupattas can make a bold statement.
What’s the best dupatta drape for beginners?
The Side Sweep is the easiest and most forgiving for beginners. It requires minimal pins, is very secure, and works with most fabric types.
How do I create perfect pleats?
Measure pleat width consistently (about 2-3 inches), use your fingers to crease each fold firmly, pin each pleat separately for security, and practice on a flat surface first before draping on your body.
What if I’m attending an outdoor event?
Choose more secure draping styles (Side Sweep, Belt-Cinched), use extra pins, avoid very light fabrics that blow easily, and consider adding small weights sewn into the dupatta corners.
Can I drape a dupatta with short hair?
Absolutely! The head drape may require more bobby pins, but all other styles work equally well regardless of hair length. For the head drape with short hair, use a thin hair band for extra security.
How do I choose between styles for an event?
Consider: venue (indoor/outdoor), formality level, cultural expectations, weather, how long you’ll be there, and your comfort level with various draping complexity.
Conclusion: Mastering the Art of Dupatta Styling
The dupatta is much more than a required element of traditional South Asian attire—it’s a versatile fashion accessory that can transform your entire look, express your personal style, and help you navigate various social and cultural contexts with grace and confidence.
Key Takeaways
For Everyday Ease: Master the Side Sweep drape—it’s your go-to for daily wear, offering security, style, and simplicity. Once you’ve practiced it a few times, you’ll be able to drape it perfectly in under three minutes.
For Making Statements: The One-Shoulder Statement and Double Drape are your power moves. Use these when you want to stand out, look fashion-forward, and showcase beautiful dupattas at special events.
For Cultural Respect: The Head Drape ensures you’re appropriately dressed for traditional and religious settings while maintaining style and comfort.
For Modern Fusion: The Belt-Cinched Drape bridges traditional and contemporary fashion, perfect for the modern woman who loves blending cultural elements with current trends.
Practice Makes Perfect
Like any skill, dupatta draping improves with practice. Start with the easiest style (Side Sweep), perfect it, then gradually experiment with more complex drapes. Take photos of your draping from different angles to see what works best for your body type and style.
Building Your Dupatta Collection
Invest in versatile dupattas:
- Basic Cotton (everyday): Neutral color, simple
- Formal Embellished (events): Heavy work, rich color
- Soft Chiffon (versatile): Flows beautifully for most drapes
- Statement Piece (special occasions): Unique design or heavy embellishment
Remember
The “right” way to drape a dupatta is the way that makes you feel confident, comfortable, and beautiful. While these five modern draping styles provide structure and guidance, don’t be afraid to modify them to suit your personal style, body type, and comfort level.
Cultural traditions are important, but so is your individual expression. These modern draping techniques honor the dupatta’s cultural significance while embracing contemporary aesthetics—giving you the best of both worlds.
Whether you’re running to class with a belt-cinched drape, attending a wedding with an elegant double drape, or heading to prayers with a respectful head drape, you now have the knowledge and skills to style your dupatta with confidence and flair.
The dupatta is your canvas—these five draping styles are your tools. Now go create your masterpiece!
About This Guide: This comprehensive guide combines traditional dupatta wisdom with modern styling techniques, helping contemporary women navigate South Asian fashion with confidence. Whether you’re a complete beginner or looking to expand your styling repertoire, these five modern draping styles will revolutionize how you wear and think about this beautiful cultural accessory.